
How to Set Up a POS System: Step-by-Step Guide
Table of Contents
- What You'll Need Before You Set Up a POS System
- POS System Hardware Requirements and Installation
- Network Setup and Internet Connectivity
- Software Activation, Accounts, and User Permissions
- Inventory Management, Pricebook, and Payment Processing
- Cost of POS System Setup: What to Budget For
- Testing Your POS System Before You Go Live
- POS System Training Best Practices for Your Team
Last Updated: August 17, 2026
Setting up a POS system looks straightforward until you're standing behind a counter with hardware, SKUs to enter, and employees waiting for training. This guide walks you through every stage, from unboxing peripherals to running your first live transaction. A well-configured POS setup delivers faster checkout, accurate inventory, and fewer manual errors from day one.
What You'll Need Before You Set Up a POS System
Before touching a single cable, audit what you actually need. Skipping this step is the most common reason setups stall on launch day.
Hardware checklist:
- POS terminal or tablet (iPad, Android, or proprietary device)
- Card reader with support for chip, tap, and swipe
- Receipt printer (thermal is standard; Bluetooth or USB)
- Cash drawer (connects to receipt printer via RJ11 cable)
- Barcode scanner (USB or Bluetooth; 2D scanners read QR codes)
- Label printer if you print your own price tags
Software and accounts to prepare:
- Your POS software subscription activated and logged in
- Merchant account or payment gateway credentials
- Product catalog and pricing data exported from your current system
- Employee list with roles defined
- Tax jurisdiction information for your state
Connectivity requirements:
- Stable internet connection (wired Ethernet preferred for the main terminal)
- Backup mobile hotspot for outage resilience
- Network router with a dedicated VLAN for POS devices if handling card data
Gather all of this two days early, not the morning of. Supplier delays, missing cables, or expired credentials will cost more time than the setup itself.
POS System Hardware Requirements and Installation
POS system hardware requirements depend on your store type, transaction volume, and counter layout. A single-lane boutique has different needs than a multi-station grocery.
Position your main terminal at ergonomic height, roughly 36 to 42 inches from the floor. Mount the customer-facing display if included. Run cables along cable channels to keep the workspace clean and reduce trip hazards.
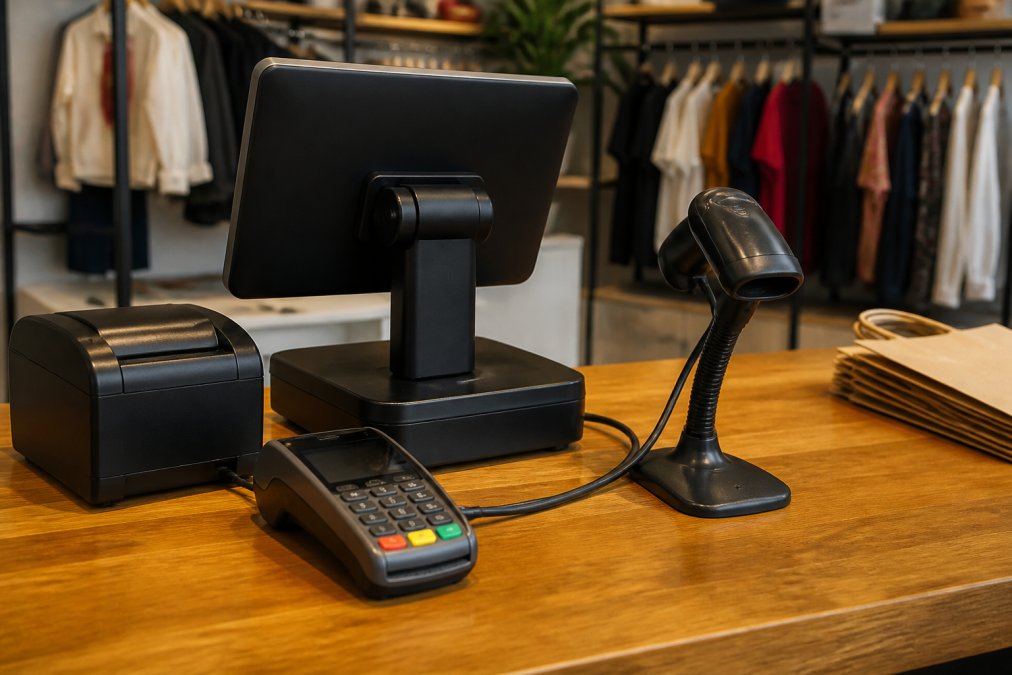
Connect the receipt printer first, since the cash drawer typically daisy-chains off it. Plug the cash drawer's RJ11 cable into the DK port on the back of the printer. Power on both devices and confirm the printer feeds a test page. For the card reader, follow your payment processor's pairing instructions precisely. Many modern card readers connect via Bluetooth and require a firmware update on first boot. Allow 10 to 15 minutes for this step.
Connecting Peripheral Devices
Peripheral device integration is where most DIY setups introduce errors. The order of operations matters.
- Receipt printer - Install drivers if USB; pair via Bluetooth if wireless. Print a test page.
- Cash drawer - Connect to printer's drawer-kick port. Test by triggering an open command from the POS software's settings menu.
- Barcode scanner - Plug in USB or pair Bluetooth. Open a text editor and scan a barcode to confirm correct output before configuring in the POS software.
- Card reader - Pair and update firmware. Run a test authorization of $0.01 if your processor allows it.
- Label printer - Install the manufacturer's print driver and connect the POS software's label template to your product catalog.
Test each device in isolation, then run an end-to-end transaction that triggers all of them together before considering the hardware phase complete.
Network Setup and Internet Connectivity
Network infrastructure is the invisible foundation of your entire point of sale operation. Get it wrong and you'll face intermittent connectivity, failed card transactions, and reporting gaps that are nearly impossible to diagnose under pressure.
For any store processing card payments, the PCI Security Standards Council's network segmentation guidance recommends isolating POS devices on their own network segment, separate from guest Wi-Fi and back-office systems. This reduces your PCI compliance scope and limits exposure if any device is compromised.
Practical network setup steps:
- Connect your router and confirm the ISP signal is stable.
- Create a dedicated VLAN or separate SSID for POS hardware.
- Assign static IP addresses to each POS terminal and peripheral to prevent address conflicts.
- Test upload and download speeds from the POS terminal's physical location.
- Configure a 4G/5G backup hotspot and test automatic failover before launch day.
Wired Ethernet connections are always preferable for the primary terminal. Wireless is acceptable for secondary stations and mobile card readers, but treat any wireless-only setup as a risk you're accepting.
Software Activation, Accounts, and User Permissions
After activating your POS software license and logging in, work through this sequence:
- Connect your payment gateway - Enter your merchant account credentials or payment processor API keys. Confirm the terminal configuration shows the correct merchant ID.
- Set your store details - Business name, address, and currency must match your merchant account exactly to avoid payment holds.
- Configure receipt settings - Add your logo, return policy summary, and website URL.
- Set up user accounts - Create individual logins for every employee. Shared passwords are a security and accountability problem.
Configuring Tax Rules and Compliance Settings
Tax configuration is critical and should not be an afterthought. Sales tax rules vary by state, county, and product category. Some states tax clothing differently from electronics; some exempt groceries entirely. The Sales Tax Institute's state-by-state tax guide is a reliable reference for confirming which rates apply to your product types.
Configure tax rules in your POS software by entering your primary nexus state and any additional states where you have sales tax obligations, assigning the correct tax category to each product type, enabling automatic tax calculation if supported, and setting up tax-exempt customer profiles for wholesale or nonprofit buyers. Run a test transaction for each tax category before launch.
Inventory Management, Pricebook, and Payment Processing
Getting your inventory management and pricebook right before launch is non-negotiable. Every transaction after go-live depends on accurate product data.
Most POS platforms accept a CSV import for bulk product uploads. Your pricebook file should include: SKU, product name, description, price, cost, tax category, and barcode. Clean this file before importing. Duplicate SKUs, missing barcodes, and inconsistent pricing formats will cause import errors.
Payment processing setup:
- Confirm your payment gateway supports end-to-end encryption for card data in transit.
- Enable contactless payment (NFC) on your card reader for tap-to-pay transactions.
- Set up your tip configuration if applicable to your business type.
- Configure your transaction processing limits and decline handling messages.
- Test at least one of each payment type: chip, tap, swipe, and cash.
According to the Federal Reserve's Diary of Consumer Payment Choice, cash still accounts for a meaningful share of in-person transactions, so configure your cash drawer handling carefully, including opening float amounts and end-of-day reconciliation procedures.
Migrating Data from a Legacy System
Data migration from a legacy system is the most underestimated part of any POS setup. Most retailers have years of customer data, purchase history, and loyalty point balances sitting in a system they're about to replace.
Before you migrate, audit what you actually need: active customer database with contact information and purchase history, current inventory counts and cost data, open purchase orders or layaways, and loyalty program balances. Export everything from your old system in CSV or XML format before deactivating it. Map your old data fields to your new system's field names carefully; a mismatch will orphan records.
Shopify POS handles omnichannel inventory synchronization natively, which means migrated product data and customer records sync across your online store and physical locations in real time.
| Migration Task | Priority | Estimated Time |
|---|---|---|
| Export customer database | High | 1-2 hours |
| Clean and map product catalog | High | 2-4 hours |
| Import inventory with current counts | High | 1-3 hours |
| Transfer loyalty balances | Medium | 2-6 hours |
| Archive historical transaction data | Low | 30 minutes |
Cost of POS System Setup: What to Budget For
The cost of POS system setup varies based on the number of terminals, peripheral devices, and software tier you need. Check directly with your provider for current figures.
Budget categories every retailer should plan for: hardware (card readers, receipt printers, cash drawers, barcode scanners), software subscription (typically monthly, tiered by feature set or transaction volume), payment processing fees (percentage-based per transaction), installation and setup labor, training time, and ongoing maintenance (software updates, hardware replacement cycles, support contracts).
According to the National Retail Federation's technology spending benchmarks, technology investment is consistently among the top operational priorities for retail businesses. Budget conservatively and build in a contingency for hardware that arrives damaged or incompatible.
Testing Your POS System Before You Go Live
System testing is the difference between a smooth launch and a public failure. Most setups that fail on opening day skipped this phase or compressed it to 30 minutes the night before.
Run a full end-to-end test at least 48 hours before your launch date. This gives you time to resolve issues without pressure.
Pre-launch testing checklist:
- Process a chip payment and confirm receipt prints correctly
- Process a tap payment and confirm cash drawer opens
- Process a cash transaction and confirm change calculation
- Scan every barcode category and confirm correct product pulls up
- Trigger a refund and confirm inventory adjusts
- Create a new customer record and confirm it appears in your customer database
- Apply a discount code and confirm the correct price calculates
- Check real-time reporting: confirm the test transaction appears in your dashboard
- Test on a secondary terminal if you have one
- Simulate an internet outage and confirm offline mode activates correctly
The offline mode test is the one most retailers skip. Every cloud-based POS system should support local transaction processing when internet connectivity drops. Confirm yours does before you need it.
POS System Training Best Practices for Your Team
Staff training is where POS system implementations succeed or fail in practice. The hardware can be perfect and the software configured correctly, but if your team isn't confident using the system, you'll see slow checkout times, voided transactions, and frustrated customers.

POS system training best practices start with role-based instruction. A cashier needs to master transaction processing, refunds, and discount application. A shift manager needs those skills plus end-of-day reconciliation, reporting, and user account management.
Structure your training program as follows:
- Guided walkthrough - Manager demonstrates each function live on the actual hardware.
- Supervised practice - Each employee completes 10 practice transactions with a trainer watching.
- Independent practice - Employees complete transactions without assistance while trainer observes.
- Edge case training - Walk through refunds, split payments, voided transactions, and offline mode.
- Quick-reference card - Post a laminated cheat sheet at each terminal covering the five most common tasks.
Build a short recorded walkthrough video during your initial setup while the system is fresh. A 10-minute screen recording of the core transaction flow saves hours of one-on-one retraining every time someone new joins the team.
Post-setup maintenance matters too. Schedule a monthly review of user permissions to remove access for departed employees, a quarterly firmware check for card readers and printers, and an annual PCI compliance self-assessment. The PCI DSS compliance guidelines for merchants outline specific requirements for maintaining a secure cardholder data environment long after initial setup. Review them annually, not just when you're setting up.
Getting a POS system configured correctly is a project, not an afternoon task, and the retailers who treat it that way launch with fewer problems and recover faster when something goes wrong. Shopify POS is built for exactly this kind of multichannel operation, keeping your in-store and online inventory synchronized in real time, with built-in payment processing, a customer database, and real-time reporting all in one platform. Try Shopify free and get your point of sale setup running the right way from day one.
Frequently Asked Questions
Can I set up my own POS system without technical experience?
Yes. Most modern cloud-based POS systems, including Shopify POS, are designed for non-technical users. Hardware typically connects via Bluetooth or USB, and software walks you through configuration step by step. The biggest time investment is loading your product catalog and configuring tax settings. Most small retailers complete a basic setup in a single day. If you run into issues, most providers offer onboarding support to help you get the system running.
What hardware is required for a complete POS setup?
A complete POS setup generally includes a tablet or terminal to run the software, a card reader for payment processing, a receipt printer, a cash drawer, and a barcode scanner for inventory lookup. Some retailers also add a customer-facing display. The exact hardware you need depends on your store format. A pop-up vendor may only need a smartphone and a card reader, while a full retail store typically needs the complete set of peripheral devices.
How much does it cost to set up a POS system?
Setup costs vary based on hardware, software subscription tier, and whether you need professional installation. Hardware bundles can range from a few hundred dollars for a basic card reader and tablet stand to over a thousand for a full kit with receipt printer, cash drawer, and barcode scanner. Software is typically priced as a monthly subscription. Check the provider's website for current pricing, since costs depend on the plan, number of locations, and any add-on features you need.
How do I integrate my inventory with a new POS system?
Start by exporting your existing product list as a CSV file from your current platform or spreadsheet. Most POS systems, including Shopify POS, let you import that file directly to populate your inventory. After import, verify quantities, assign barcodes if needed, and organize products into collections or categories. If you're migrating from a legacy system, map your old SKUs to the new ones before importing to avoid duplicate entries or stock count errors.
This article was written using GrandRanker